はじめに
こちらの記事はSpringSecurityでログイン機能を実装したものの、ログイン後の画面遷移などをどのように設定すればよいか分からない方に参考になる可能性があります。
今回は「WebSecurityConfig.java」を編集し、画面遷移先を編集し、レイアウトの調整までをゴールとしています。またSpringSecurityログイン機能に関しては今回で最後となります。
過去の記事で導入から解説していますので、気になる方は参照いただけると幸いです。
SpringSecurityでログイン機能の導入手順を解説しています
SpringSecurityでデフォルトのログインが出来る手順を解説しています
SpringSecurityのWebSecurityConfigの設定に関して解説しています
SpringSecurityでDBの値でログインする実装手順を解説しています
ホーム画面のページ遷移を制限する
実装したい事は以下です。
- ログインした場合は、ホーム画面である「/」に遷移できなくする
また、実装するためには「WebSecurityConfig.java」の編集と「CustomRedirectFilter.java」の新規作成が必要となります。
WebSecurityConfig.java
- 22行目で定義したカスタムフィルタを追加する
- 42行目から53行目を追加する
package com.app.progTrack.security;

import org.springframework.context.annotation.Bean;
import org.springframework.context.annotation.Configuration;
import org.springframework.security.config.annotation.method.configuration.EnableMethodSecurity;
import org.springframework.security.config.annotation.web.builders.HttpSecurity;
import org.springframework.security.config.annotation.web.configuration.EnableWebSecurity;
import org.springframework.security.config.http.SessionCreationPolicy;
import org.springframework.security.crypto.bcrypt.BCryptPasswordEncoder;
import org.springframework.security.crypto.password.PasswordEncoder;
import org.springframework.security.web.SecurityFilterChain;
import org.springframework.security.web.authentication.UsernamePasswordAuthenticationFilter;

@Configuration
@EnableWebSecurity
@EnableMethodSecurity
public class WebSecurityConfig {
	@Bean
	public SecurityFilterChain securityFilterChain(HttpSecurity http) throws Exception {

		// カスタムフィルタの追加
		http.addFilterBefore(new CustomRedirectFilter(), UsernamePasswordAuthenticationFilter.class);

		http.authorizeHttpRequests((requests) -> requests
			// 全てのユーザーにアクセスを許可するURLを設定できる
			.requestMatchers("/css/**", "/").permitAll()
			.anyRequest().authenticated()
		)

		.formLogin((form) -> form.loginPage("/login")
			.loginProcessingUrl("/login")
			.defaultSuccessUrl("/studytime")
			.failureUrl("/login?error")
			.permitAll()
		)

		.logout((logout) -> logout
			.logoutSuccessUrl("/login?loggedOut")
			.permitAll()
		)

		// ログインしている場合のリダイレクト設定
		.exceptionHandling(exception -> exception
			.accessDeniedPage("/access-denied")
		)

		.sessionManagement(session -> session
			.sessionCreationPolicy(SessionCreationPolicy.IF_REQUIRED)
		)

		.csrf(csrf -> csrf
			.disable()
		);

		return http.build();
	}

	@Bean
	public PasswordEncoder passwordEncoder() {
		return new BCryptPasswordEncoder();
	}
}
43~45行目 解説
		.exceptionHandling(exception -> exception
			.accessDeniedPage("/access-denied")
		)
エラーページのURLを指定する事により、リダイレクト先を指定している
47~49行目 解説
	.sessionManagement(session -> session
			.sessionCreationPolicy(SessionCreationPolicy.IF_REQUIRED)
)- セッション管理に関連する設定を行うメソッド
- 「IF_REQUIRED」→必要な場合のみセッションを作成する
- 「SessionCreationPolicy」→セッションの作成ポリシーを設定する
51~53行目 解説
.csrf(csrf -> csrf
			.disable()
);- CSFR攻撃に対する設定を行うが上記は「設定なし」にしている
- ログインし、クライアントが正規のクライアントという事が保証されているため上記に設定
CustomRedirectFilter.java
以下のように「CustomRedirectFilter.java」を作成します。

このクラスはユーザーが特定の条件を満たす場合にリダイレクトを行うフィルタです。コメントアウトで、コードの意味を解説してますので、見ながら記述していきましょう!
package com.app.progTrack.security;

import java.io.IOException;

import org.springframework.security.core.context.SecurityContextHolder;
import org.springframework.web.filter.GenericFilterBean;

import jakarta.servlet.FilterChain;
import jakarta.servlet.ServletException;
import jakarta.servlet.ServletRequest;
import jakarta.servlet.ServletResponse;
import jakarta.servlet.http.HttpServletRequest;
import jakarta.servlet.http.HttpServletResponse;

public class CustomRedirectFilter extends GenericFilterBean{
	// 「doFilter」メソッドはリクエストとレスポンスを処理し次のフィルタまたはリソースに渡す
	@Override
	public void doFilter(ServletRequest request, ServletResponse response, FilterChain  chain) throws IOException, ServletException {

		// リクエストとレスポンスのキャスト これによりHTTP特有のメソッドを使用できるようにする
		HttpServletRequest httpRequest = (HttpServletRequest) request;
		HttpServletResponse httpResponse = (HttpServletResponse) response;


		// リクエストURIが「/」であり、ユーザーがログインしている場合「/studytime」へリダイレクトさせる
		if (httpRequest.getRequestURI().equals("/") && SecurityContextHolder.getContext().getAuthentication() != null) {
			httpResponse.sendRedirect("/studytime");
			return;
		}

		chain.doFilter(request, response);
	}

}
「URLを「/」を指定する」

「Enterを押下すると「/studytime」へリダイレクトされる」

これにより、ログインユーザーはホーム画面には遷移出来なくなりました。
レイアウトを調整する
画像を扱う
今回はホーム画面に壁紙を貼りたいので、イメージ画像を保管する場所を作成する必要があります。

イメージ画像を保管する場合は既存のフォルダである「static」フォルダの下に「images」というフォルダを作成しその中に保管していきます。

そして、ドラッグ&ドロップで画像を保管します。


WebSecurityConfig.javaを編集する
新しくフォルダを作成したので、このフォルダを許可する設定を行います。「WebSecurityConfig.java」を編集します。
package com.app.progTrack.security;

import org.springframework.context.annotation.Bean;
import org.springframework.context.annotation.Configuration;
import org.springframework.security.config.annotation.method.configuration.EnableMethodSecurity;
import org.springframework.security.config.annotation.web.builders.HttpSecurity;
import org.springframework.security.config.annotation.web.configuration.EnableWebSecurity;
import org.springframework.security.config.http.SessionCreationPolicy;
import org.springframework.security.crypto.bcrypt.BCryptPasswordEncoder;
import org.springframework.security.crypto.password.PasswordEncoder;
import org.springframework.security.web.SecurityFilterChain;
import org.springframework.security.web.authentication.UsernamePasswordAuthenticationFilter;

@Configuration
@EnableWebSecurity
@EnableMethodSecurity
public class WebSecurityConfig {
	@Bean
	public SecurityFilterChain securityFilterChain(HttpSecurity http) throws Exception {

		// カスタムフィルタの追加
		http.addFilterBefore(new CustomRedirectFilter(), UsernamePasswordAuthenticationFilter.class);

		http.authorizeHttpRequests((requests) -> requests
			// 全てのユーザーにアクセスを許可するURLを設定できる
			.requestMatchers("/css/**").permitAll()
			.requestMatchers("/").permitAll()
			.requestMatchers("/images/**").permitAll()
			.anyRequest().authenticated()
		)

		.formLogin((form) -> form.loginPage("/login")
			.loginProcessingUrl("/login")
			.defaultSuccessUrl("/studytime")
			.failureUrl("/login?error")
			.permitAll()
		)

		.logout((logout) -> logout
			.logoutSuccessUrl("/login?loggedOut")
			.permitAll()
		)

		// ログインしている場合のリダイレクト設定
		.exceptionHandling(exception -> exception
			.accessDeniedPage("/access-denied")
		)

		.sessionManagement(session -> session
			.sessionCreationPolicy(SessionCreationPolicy.IF_REQUIRED)
		)

		.csrf(csrf -> csrf
			.disable()
		);

		return http.build();
	}

	@Bean
	public PasswordEncoder passwordEncoder() {
		return new BCryptPasswordEncoder();
	}
}
home.htmlを編集する
<!DOCTYPE html>
<html xmlns:th="http://www.thymeleaf.org">
<head>
	<meta charset="UTF-8">
	<title>ホーム画面</title>
	<!-- Bootstrap -->
    <link href="https://cdn.jsdelivr.net/npm/bootstrap@5.3.0/dist/css/bootstrap.min.css" rel="stylesheet" integrity="sha384-9ndCyUaIbzAi2FUVXJi0CjmCapSmO7SnpJef0486qhLnuZ2cdeRhO02iuK6FUUVM" crossorigin="anonymous">
</head>
<body>
	<div class="container">
		<div class="row">
			<img th:src="@{/images/home.png}" alt="ホーム画像" class="img-fluid" />
		</div>
		<div class="row text-center">
			<h1 style="color: #2d196f;">勉強を習慣にしていこう!</h1>
			<h2 style="color: #2d196f;">自分の勉強した時間を記録していこう!</h2>
		</div>
		<div class="row justify-content-center">
			<div class="col-6 text-end">
				<button type="submit" class="btn btn-primary ms-6">新規アカウント登録</button>
			</div>
			<div class="col-6 text-start">
				<a th:href="@{/login}" onclick="event.preventDefault(); document.getElementById('login-form').submit();">すでにアカウントをお持ちの方</a>
				<form id="login-form" th:action="@{/login}" method="get"></form>
			</div>
		</div>
	</div>
	<!-- Bootstrap -->
    <script src="https://cdn.jsdelivr.net/npm/bootstrap@5.3.0/dist/js/bootstrap.bundle.min.js" integrity="sha384-geWF76RCwLtnZ8qwWowPQNguL3RmwHVBC9FhGdlKrxdiJJigb/j/68SIy3Te4Bkz" crossorigin="anonymous"></script>
</body>
</html>
login.htmlを編集する
<!DOCTYPE html>
<html>
<head>
	<meta charset="UTF-8">
	<title>ログイン画面</title>
	<!-- Bootstrap -->
	<link href="https://cdn.jsdelivr.net/npm/bootstrap@5.3.0/dist/css/bootstrap.min.css" rel="stylesheet" integrity="sha384-9ndCyUaIbzAi2FUVXJi0CjmCapSmO7SnpJef0486qhLnuZ2cdeRhO02iuK6FUUVM" crossorigin="anonymous">

</head>
<body>
	<header>
		<nav class="navbar navbar-expand-lg mb-5" style="background-color: white; box-shadow: 0 2px 5px rgba(128, 128, 128, 0.5);">
		    <div class="container">
		        <a class="navbar-brand" th:href="@{/}">
		            <img src="/images/heder_logo.png" alt="PROG-TRACK" style="height: 50px;" />
		        </a>
		        <ul class="navbar-nav">
		            <li class="nav-item">
		                <a class="nav-link" th:href="@{/login}">ログイン</a>
		            </li>
		            <li class="nav-item">
		                <a class="nav-link" th:href="@{/signup}">会員登録</a>
		            </li>
		        </ul>
		    </div>
		</nav>
	</header>
	<main>
		<div class="container d-flex align-items-center justify-content-center">
		    <div class="row">
		        <h1 class="mb-4 text-center" style="color: #2d196f;">ログイン</h1>

		        <div th:if="${param.loggedOut}" class="alert alert-info" role="alert">
		            ログアウトしました
		        </div>

		        <div th:if="${param.error}" class="alert alert-danger" role="alert">
		            メールアドレス、パスワードが正しく入力されていません
		        </div>

		        <form th:action="@{/login}" method="post" class="p-4 border rounded shadow-sm bg-light">
		            <div class="mb-3">
		                <label class="form-label fw-bold">メールアドレス</label>
		                <input type="text" name="username" autocomplete="email" placeholder="メールアドレス" class="form-control" autofocus required>
		            </div>
		            <div class="mb-3">
		                <label class="form-label fw-bold">パスワード</label>
		                <input type="password" name="password" autocomplete="new-password" placeholder="パスワード" class="form-control" required>
		            </div>
		            <div>
		                <button type="submit" class="btn btn-primary w-100">ログイン</button>
		            </div>
		        </form>
		    </div>
		</div>
	</main>

	<!-- Bootstrap -->
    <script src="https://cdn.jsdelivr.net/npm/bootstrap@5.3.0/dist/js/bootstrap.bundle.min.js" integrity="sha384-geWF76RCwLtnZ8qwWowPQNguL3RmwHVBC9FhGdlKrxdiJJigb/j/68SIy3Te4Bkz" crossorigin="anonymous"></script>
</body>
</html>
ブラウザで確認
あまり凝ってもしょうがないので、簡単にレイアウトを整えました。それでは、ブラウザで確認してみましょう!!
「ホーム画面」

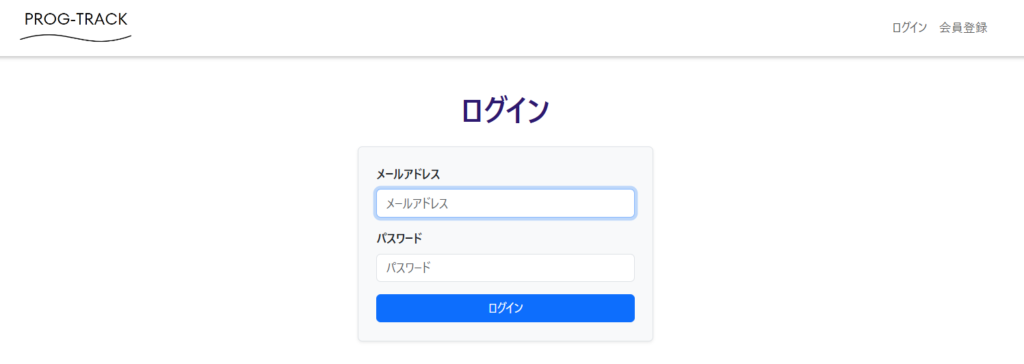
「ログイン画面」

おわりに
8章から13章までログイン機能を実装した方、大変お疲れ様でした!SpringSecuryはかなり便利な機能で、使いこなすことが出来ればベタで実装するよりも、良いものが作れると思います。
次回は新規ユーザー登録機能を実装しようと思っています。是非楽しみにしていてくださいね!それでは、また次回の記事で!お読みいただきありがとうございました。


コメント